A Guide to Professional & Quality Vocal Treatment Using Stock Plugins.
Stock plugins are pre-installed audio processing tools that come bundled with most digital audio workstations. They cover a wide range of functions, from corrective processes to creative effects. The common types of stock plugins include equalizers (EQ), compressors, reverbs, delays, pitch correction tools, modulation effects, and more. Despite being readily available, these plugins are often underestimated, overshadowed by their third-party counterparts. However, with a solid understanding of their capabilities and strategic application, stock plugins can yield remarkable results in vocal treatment.


To achieve effective vocal treatment, establishing a well-defined signal chain and understanding the order of processing is essential. The order of plugins can significantly impact the final result. A typical signal chain for vocal processing might involve corrective processes at the beginning, such as noise reduction, pitch correction and de-essing. Following that, creative processes like EQing, compression, and spatial effects like reverb and delay are applied. This ensures a streamlined workflow and maximizes the potential of each plugin.
Now that we've established the foundations of vocal treatment using stock plugins, we'll delve into the step-by-step process in the next section.
First Step to Vocal Treatment:
1. Vocal Cleaning:
Before diving into the creative aspects of vocal treatment, it's essential to address any imperfections and clean up the vocal recording. This stage involves processes like noise reduction, pitch correction and de-essing. While these corrective processes may not be the most glamorous, they lay the foundation for a polished and professional vocal sound.
(How to Use Edison to Clean Your Vocals)
Edison is one of FL studio’s stock plugins and can be used for both recording and vocal treatment. But for today we will focus on vocal treatment.

After recoding a vocal, place it on the playlist, then click on the selected rectangle shape which will pop out a menu like this below;
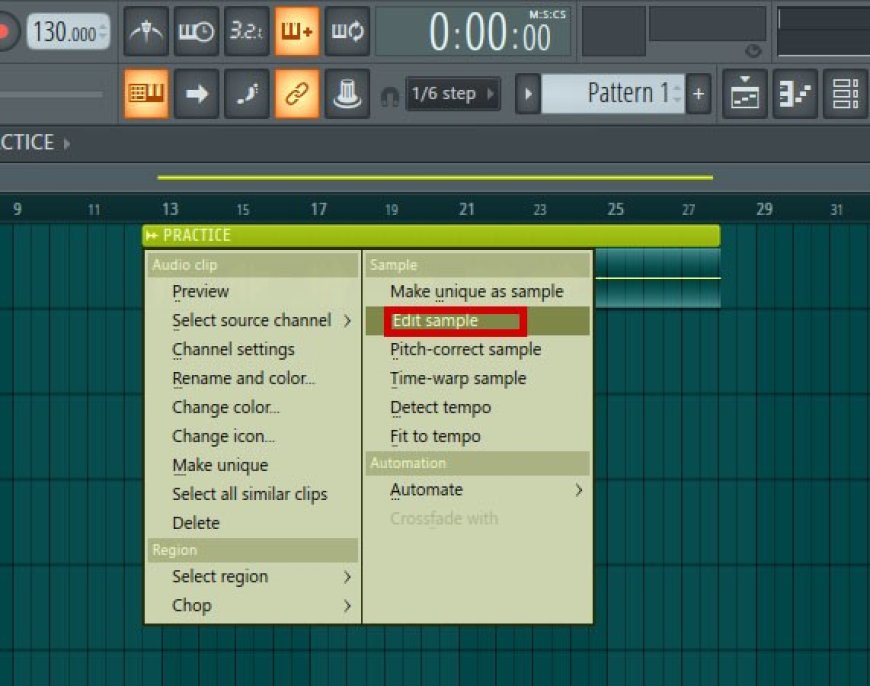
Select “Edit Sample” just as displayed with a rectangle shape which will take us to Edison as shown below

Now we are in Edison, First step is to select an area which has a white noise (Right Click and Drag) just as I did in the above picture.
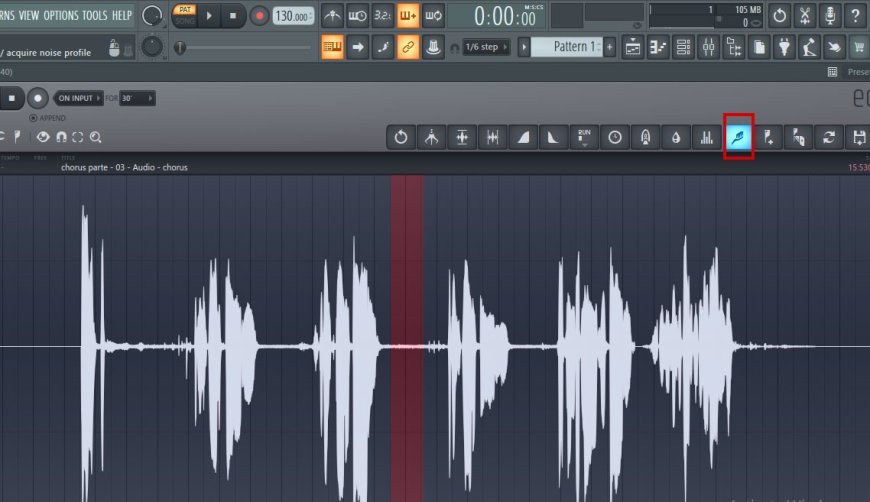
Next step is to select the “Brush Tool” this can be found above selected with a red box as displayed in the picture above.
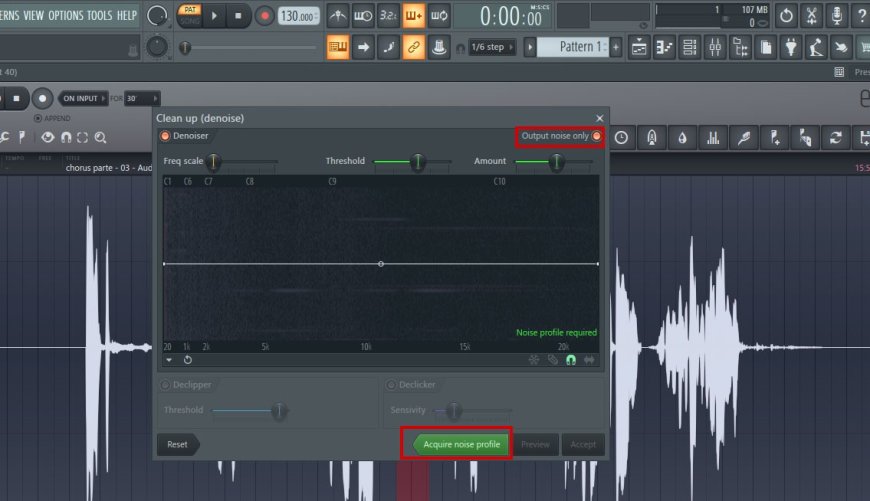
Now this box pops out. Firstly, click on “Output Noise Only” found above selected with a red box. Secondly, select “Acquire Noise Profile” as selected below with a red box in the above picture.
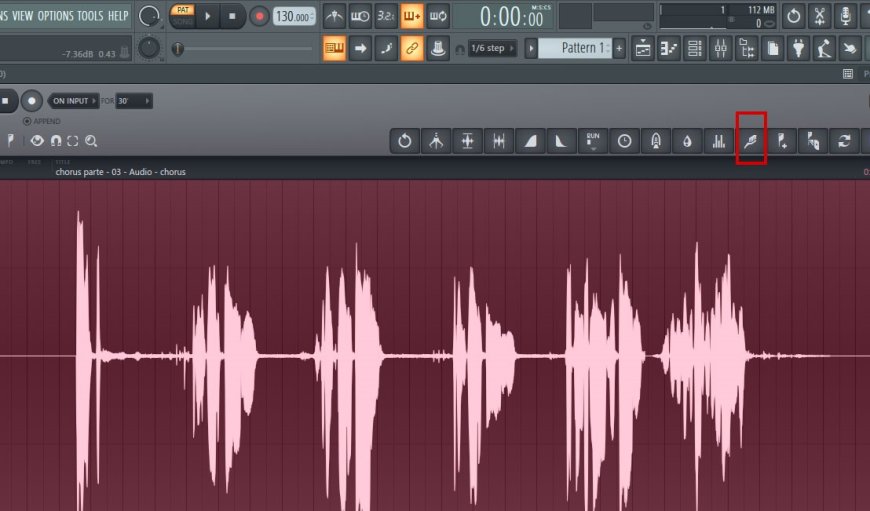
Next step is to select all the vocals by clicking “Ctrl + A” as shown in the picture above. Then click on the “Brush Tool”
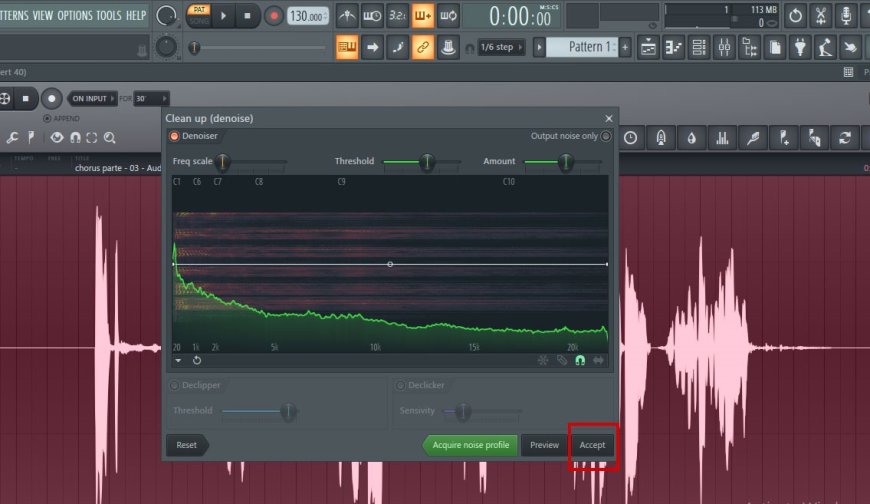
At this point you don’t need to click (Output noise only or Acquire Noise Profile) just click on “Accept” as selected with a red box in the above picture.
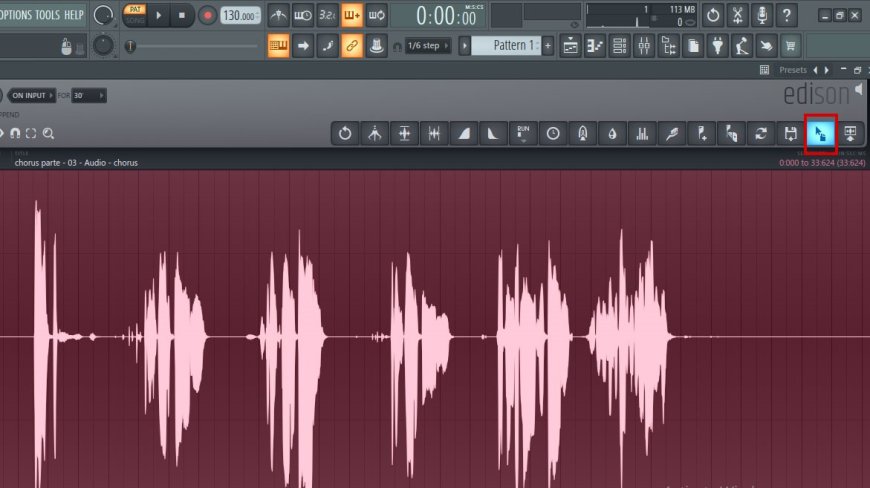
Now you will notice that the white noise has disappeared. Select the Drag Button as shown with a red box and replace with the former vocal which was on the playlist.
NOW I GUESS YOU KNOW HOW TO CLEAN A VOCAL WITH EDISON.
Get the complete course on A Guide to Professional & Quality Vocal Treatment Using Stock Plugins.
This Course Sells For #2,000 Only https://selar.co/hcqx . Limited offer, Price increases at the end of this month
What's Your Reaction?


![One-Milion-Man Protest Begins In Abuja [Video/Photos]](https://afrostrain.com/uploads/images/202408/image_430x256_66b7b0b0b08ad.jpg)


![DJ Spark - 2023 Non Stop Party Afro Mix [Mixtape]](https://img.youtube.com/vi/c2P6nUrGi_0/maxresdefault.jpg)


